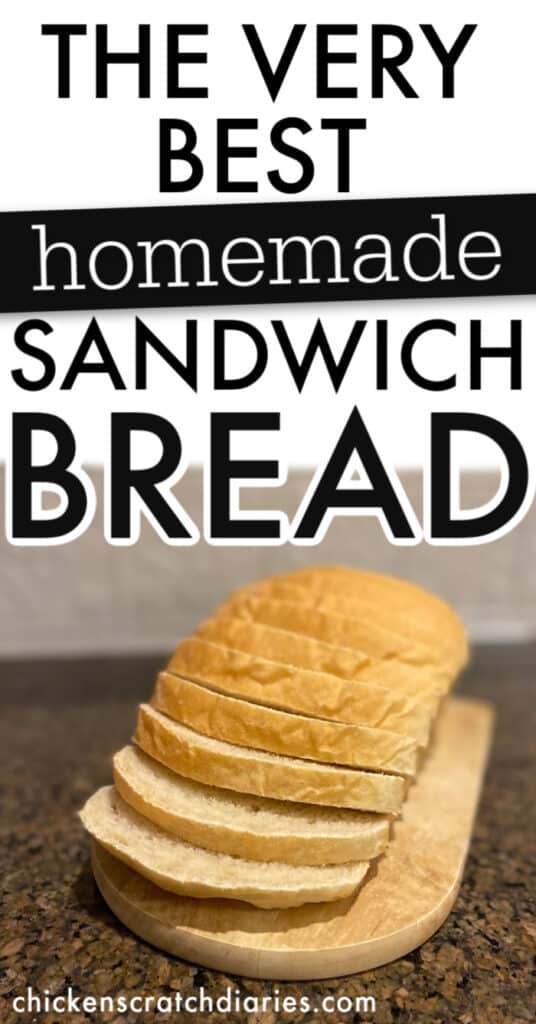
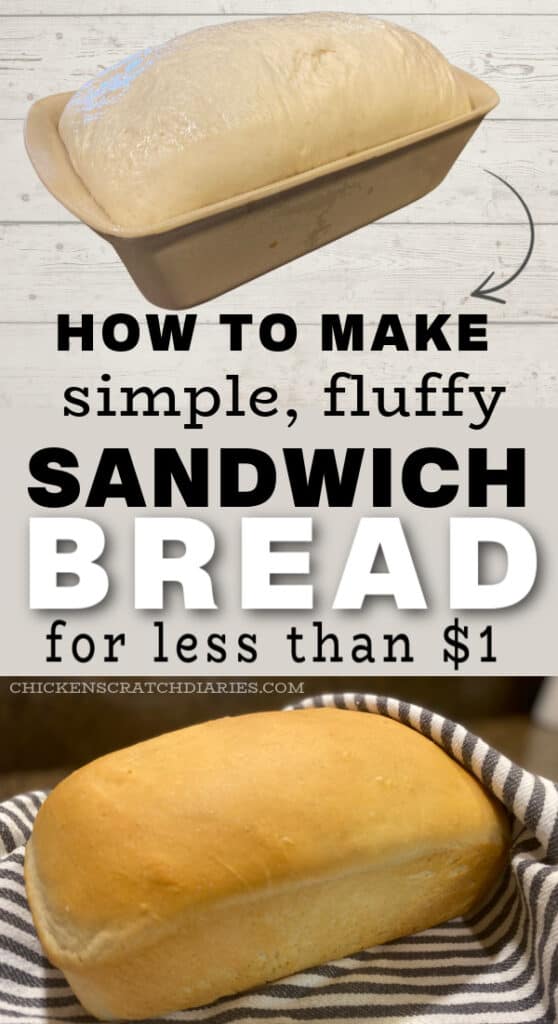
Thrifty Homemade Sandwich Bread Recipe

I’ve spent some time working on the perfect homemade sandwich bread recipe, and I think I’ve found it!
If you’ve ever wanted to learn how to make bread from scratch, I’m going to outline the process for this frugal bread recipe.
My goal for you?
- Make bread-making as easy as possible
- Give you the confidence to make the BEST bread ever
- Assure you this is doable no matter your baking experience.
Winter baking : the inspiration for bread recipes from scratch
Winter in the Midwest means spending more time indoors (even snowed in at times).
Which also means that I have more time for baking and all things domestic. 🙂
When we stay home, we always save more money.
That should be obvious, I guess.
But I’m always astounded how little DIY projects and making more from-scratch recipes really makes a difference in our monthly budget.
So what started as a fun and frugal project quickly became a bit of an obsession from there!
A bread recipe for anyone
Now, before you think I’m sitting here baking up a storm and homesteading on a regular basis: not really.
While I make most of our dinners from scratch, I don’t usually have time for things like making bread.
But during the winter months especially, I look for comfort foods that make my home feel cozy (and smell delicious).
I like to dig out this easy sandwich bread recipe and enjoy not only eating it (it’s delicious!) but saving some money as well.
So if you’re not-a-Martha-Stewart like me, you’ll appreciate the simplicity of this process.
This post likely contains affiliate links. Please see our disclosure for more info.
Homemade bread: a simple money saving hack
When I was pregnant with my son (almost 5 years ago, sniff sniff), I took the plunge into the work-from-home world and left my steady job at a law firm.
This change came with great freedom and more time with my family but also required us to cut back on spending drastically.

P.S., I did find out eventually that it IS possible to work from home and make more than I did at that time.
I learned a lot in those first two years of freelancing, including how to make crazy good sandwich bread from scratch.
Budgeting & baking
Anyhow, I remember stumbling across a recipe for homemade sandwich bread and decided I would try it out, mainly to save money.
Who doesn’t love homemade bread, anyhow?
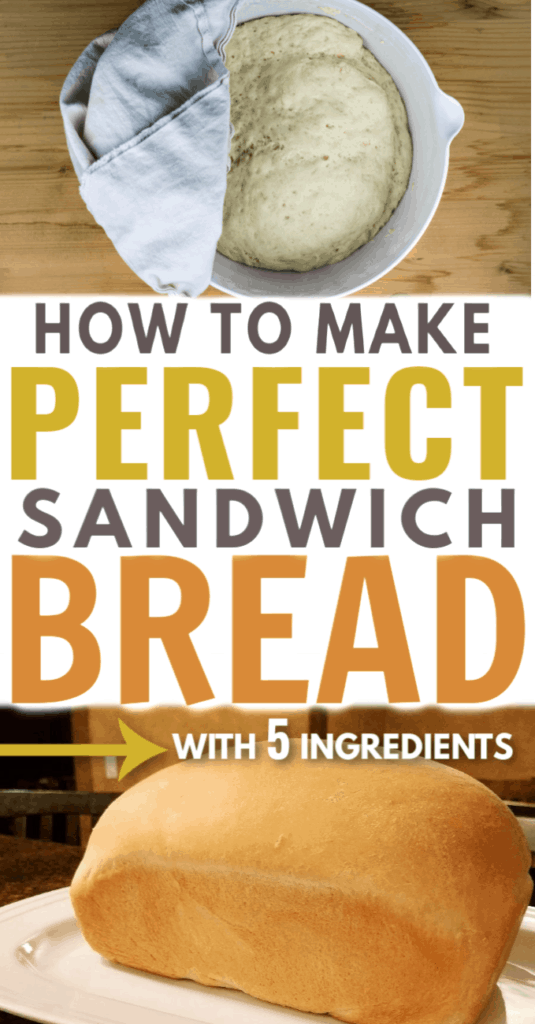
I’ve modified this simple 5-ingredient bread recipe over time through trial and error and I just love the results.
Once you learn how to make sandwich bread, you might become a little obsessed with it like we are!
Biggest benefits of making homemade bread
Normally I buy wheat bread from the store.
So yes, in some ways this isn’t the healthiest option if healthy (or gluten-free!) is your goal.
But there is the benefit of knowing what’s in your food – and avoiding preservatives in store-bought sandwich bread.
One of the things I also love about making my own bread is that this bread costs me approximately $0.64/loaf to make (at the time of posting).
It uses very simple ingredients, as you’ll notice.
This is another plus when you’re stuck at home and may not have fancy extras on hand.
You know, like powdered milk and whatnot (popular in other homemade recipes.)
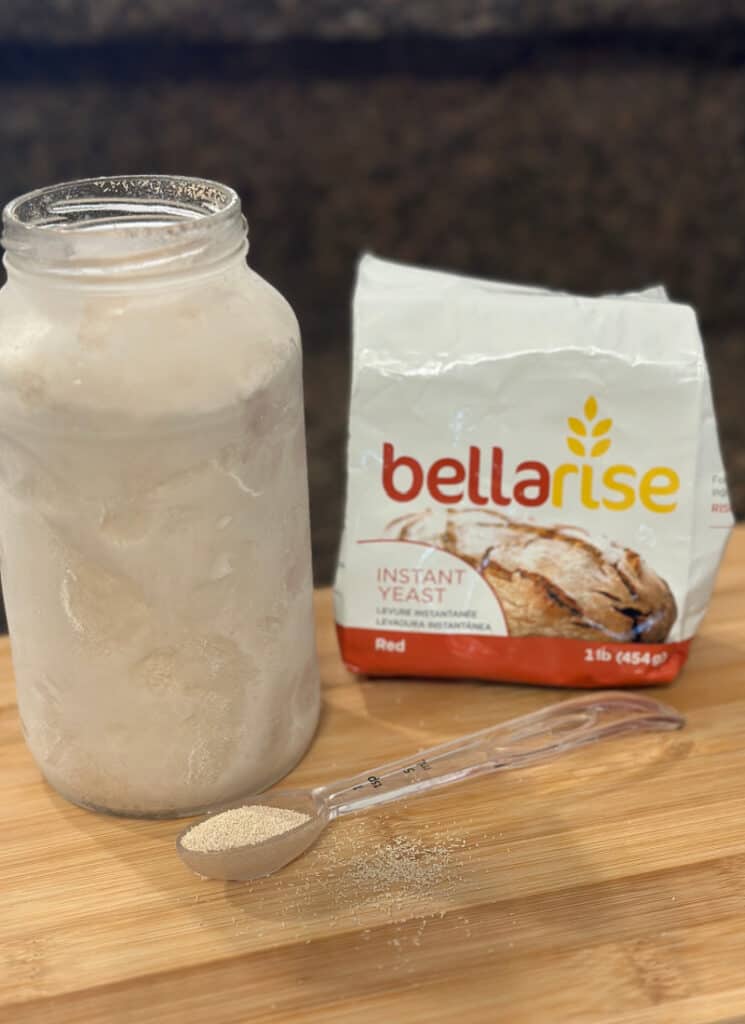
*Tip: Buy yeast in bulk at your local health food store for best value. Or check out Azure standard, my other favorite bulk goods supplier!
I buy enough to fill a quart size mason jar and keep it in my freezer where it is generally good for up to a year (sometimes longer!).
Notes on Methods for Proofing Bread Dough
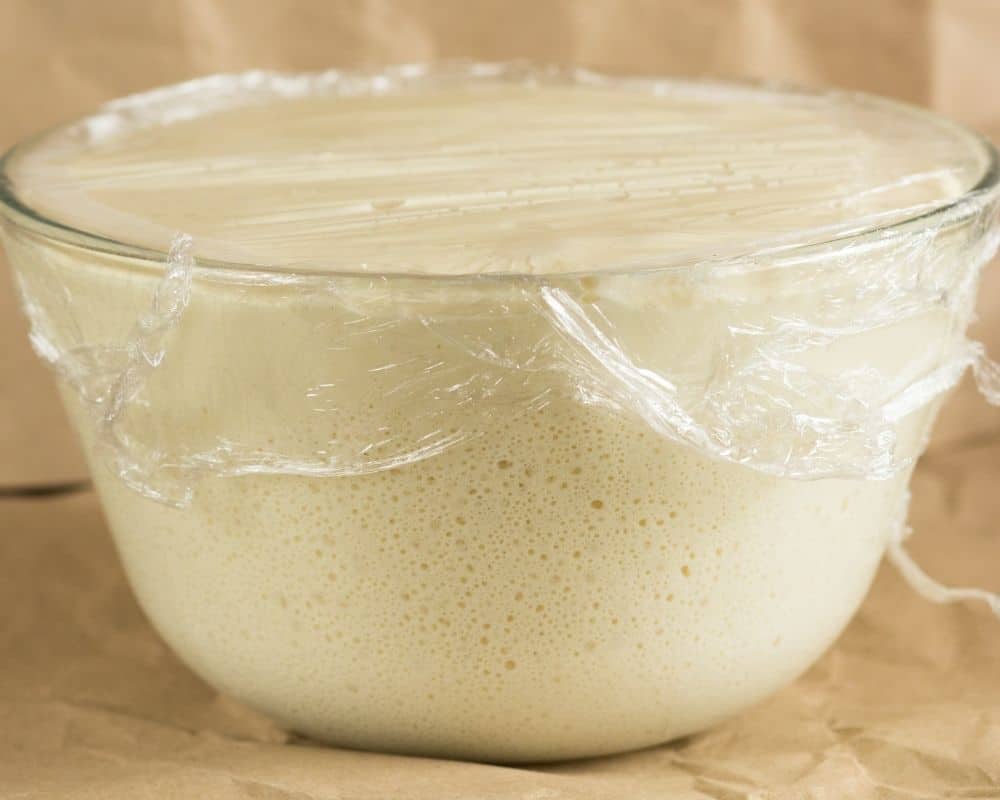
In Step #4 in the directions below, you will let the bread rise, or “proof” for the first time in a draft-free area, in the bowl.
This usually takes around 1-1.5 hours, and then it will need a 2nd rise in the bread pan to double once again.
Personally, I get the best results by not rushing this process.
The bread also seems to develop the best flavor and texture by letting the bread rise in a cool, draft-free area in my kitchen.
However, if you’re in a hurry (or just impatient!), you can try these alternative methods to speed up the proofing:
Proofing Bread dough in the Instant Pot
This is the quickest method I’ve tried.
Simply place your dough (after completing steps 1-3), in your instant pot.
Cover the top of the pot with plastic wrap and set it to the “yogurt” setting (in the Instant Pot Duo, for example).
Let rise until doubled.
For a double batch of this homemade sandwich bread recipe, it takes me about 40 minutes for the dough to double with this method.
Proofing Bread Dough on Stovetop
1| Using a Warming Center
I have a “warming center” on top of my stove which is just an extra space on the glass top to keep food warm.
(Looks like a burner, but it’s just a warmer.)
I put it on the lowest setting, and set my pan right beside (not on top of) this warming center.
You still want to lightly cover your pan with a towel or plastic wrap while proofing, with any method.
You could proof bread the 1st AND 2nd times this way, if you choose.
If I want to speed-proof though, I will do the first rise in the Instant Pot.
Then I’ll transfer to the bread pan, cover and set it near the warming center for the second rise.
2| Using a Warming Drawer
In a previous oven we owned, I had a Warming Drawer.
I would put the bread pan in that drawer for the Second rise.
It usually rose pretty rapidly with this method.
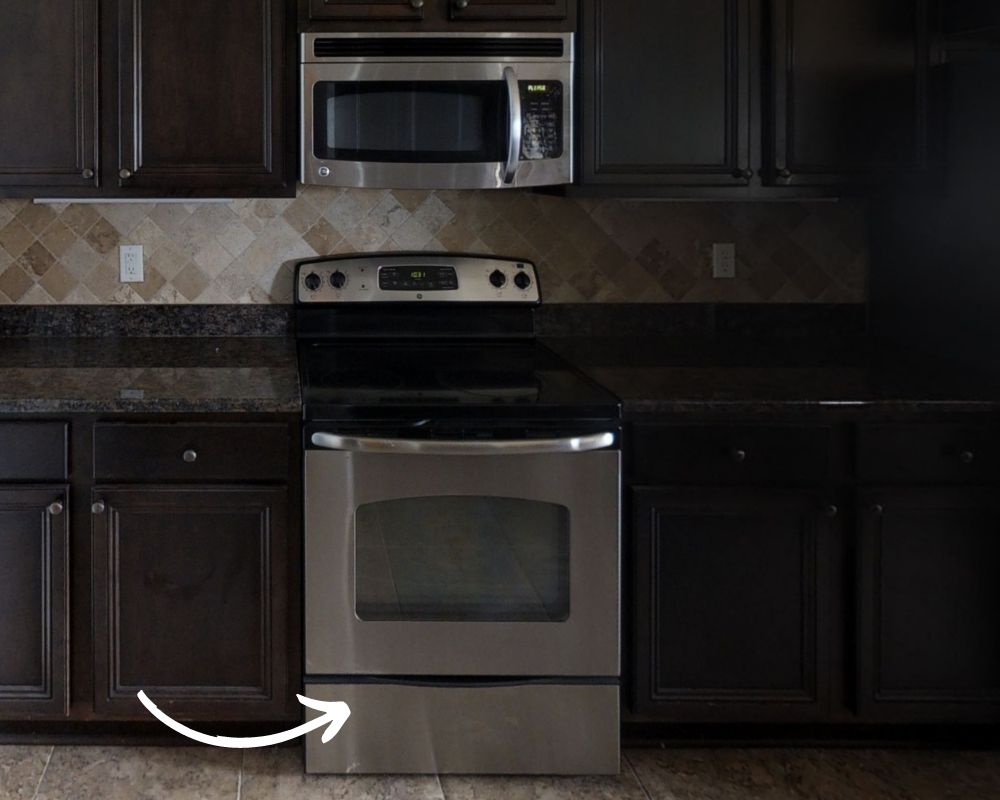
Sometimes, though, the loaf would get too tall for the space!
Keep an eye on your bread in the warming drawer, as the temperatures can vary, and you don’t want to over-proof it.
3| Using the Oven Heat on top of Stove
Some ovens produce a fair amount of heat on the stove top.
If this is the case for your oven, then heat up the oven to 350 degrees (Fahrenheit) or so.
Then set the pans on top of the stove to let the dough rise more quickly.
Although this works, some people won’t want to waste the electricity to heat the whole oven.
Proofing Bread dough in the Oven
A third method would be using the oven itself to proof the dough more quickly.
Here are a three ways to do it:
Oven method #1:
Set your oven to 200 Degrees F. Turn it off and leave the door open for a few minutes.
Place bread inside, shut the door.
Check often to prevent over-rising.
*Consider spritzing loaf with some water to keep it from drying out.
Oven Method #2:
For ovens with low-temp settings such as 140 degrees F or below:
Proof at a low temp with the oven still on.
Check often to prevent over-rising.
Oven Method #3:
If your oven has a “proof” setting, use it! This should provide a constant, low temp that is perfect for helping bread rise.
Rise times will vary with these methods.
Caution on proofing bread inside a warm oven:
I generally only proof the dough for the 2nd rise inside the oven (not the first rise).
This is probably my least-favorite method as my oven runs hot.
So sometimes it will start to bake the bread instead of just proofing it.
If your kitchen is quite cold and you don’t have this problem with your oven, it might work perfectly.
Thrifty Homemade Sandwich Bread Recipe and Instructions
*Recipe Card included at end of post
Ingredients
• 1 Cup hot water
• 2 Tablespoons of sugar
• 1/4 cup vegetable oil (or light olive oil)
• 1-1/2 teaspoons salt
• 2-3/4 teaspoons active dry yeast*
(*this is 1/2 tsp more than a standard one-use packet– another reason to buy yeast in bulk. It rises more consistently for me with the added yeast.)
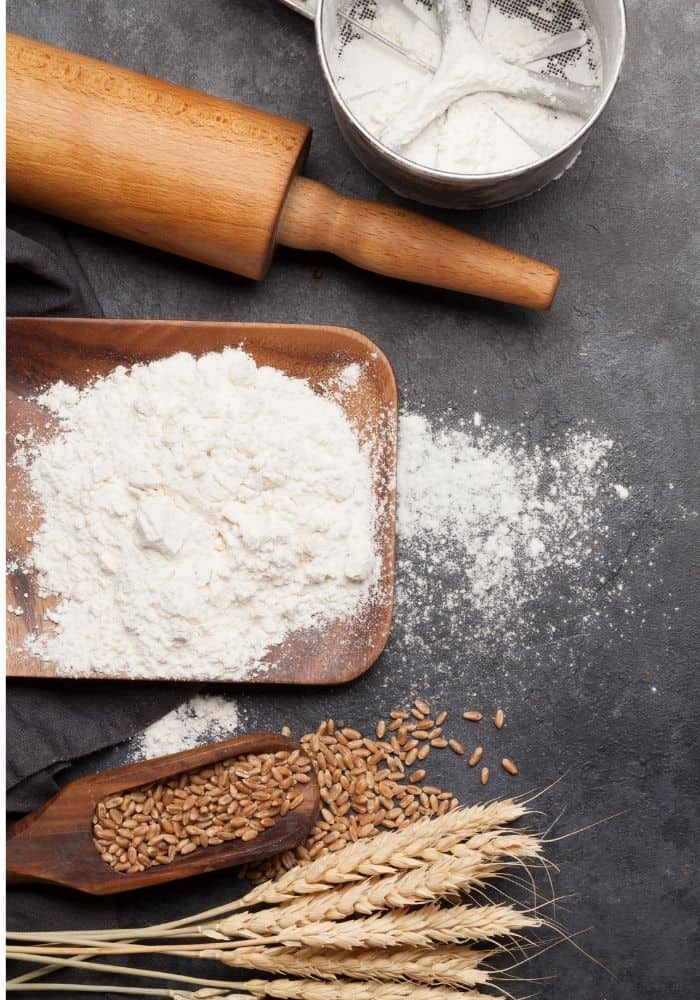
•3 cups all-purpose flour or bread flour*
*Tip: a friend mentioned once that the name-brand flours seem to make better breads and I have found this to be true, even with basic all-purpose flour. There is not much cost difference, so try it and see, especially if you have trouble with generic brands.
Directions
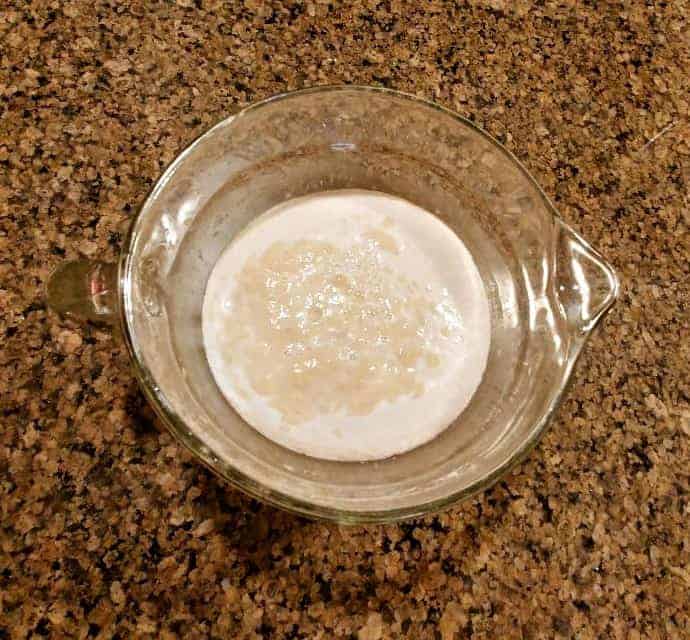
#1. Mix together the hot water (not scalding, but hot from the tap), sugar and yeast and stir.
Let sit for about 10 minutes, allowing the yeast to “bloom”. See below.
#2. Dump this mixture into a stand mixer and mix in the vegetable oil, salt and the flour, one cup at a time, using your dough hook.
Alternatively, you can use a hand mixer to combine the ingredients and then knead it by hand.
I’m terrible at kneading by hand, and have definitely gotten my money’s worth out of my stand mixer.
(This brand will last for years if you’re looking for one.)
#3. Continue mixing a few minutes until dough clings to the bread hook and doesn’t stick to the bowl.
Mix another 3-4 minutes after the non-sticky dough is formed.
(That’s a very technical baking term) 🙂
#4. Remove dough from hook, place dough ball in a bowl and cover with a light kitchen towel.
Let rise in a draft-free area for approximately 1- 1.5 hours or until the dough doubles in size.

{Or, see the paragraph earlier in this post re: the three different methods you can use to make the dough rise (proof) more quickly}.
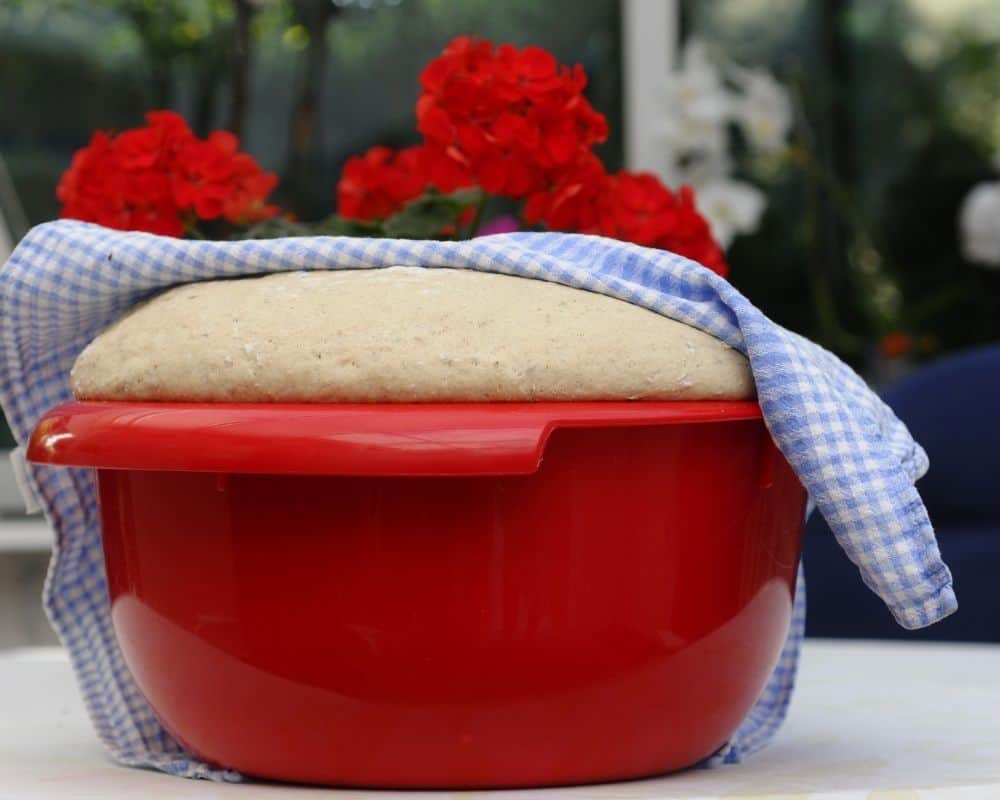
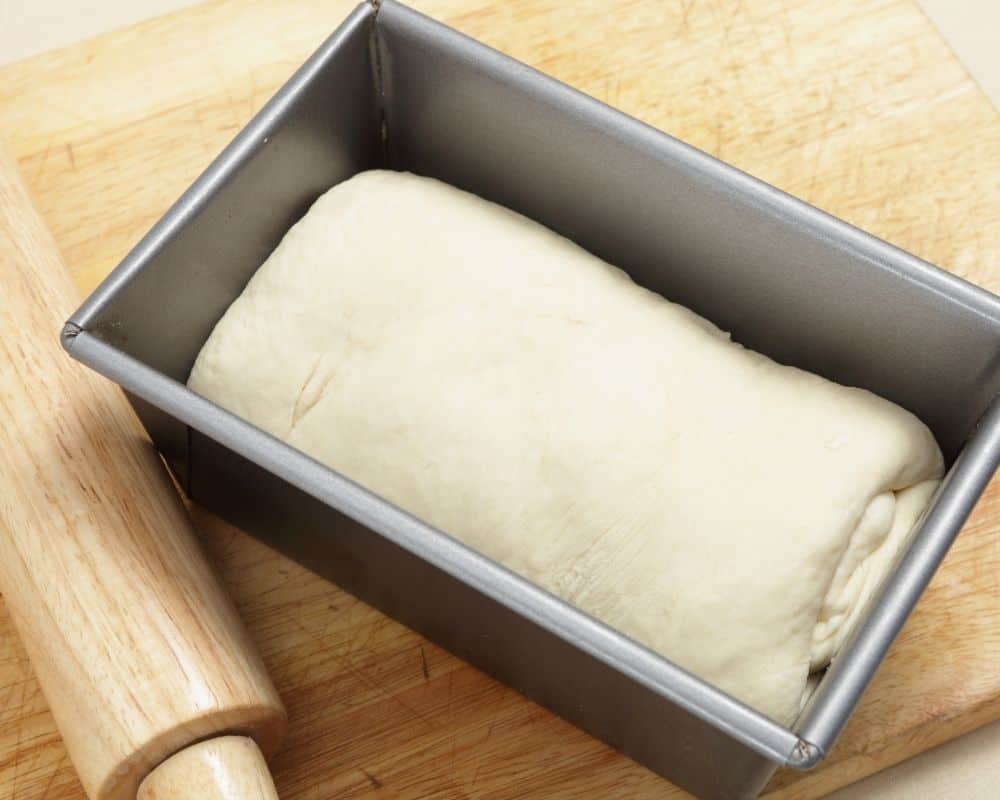
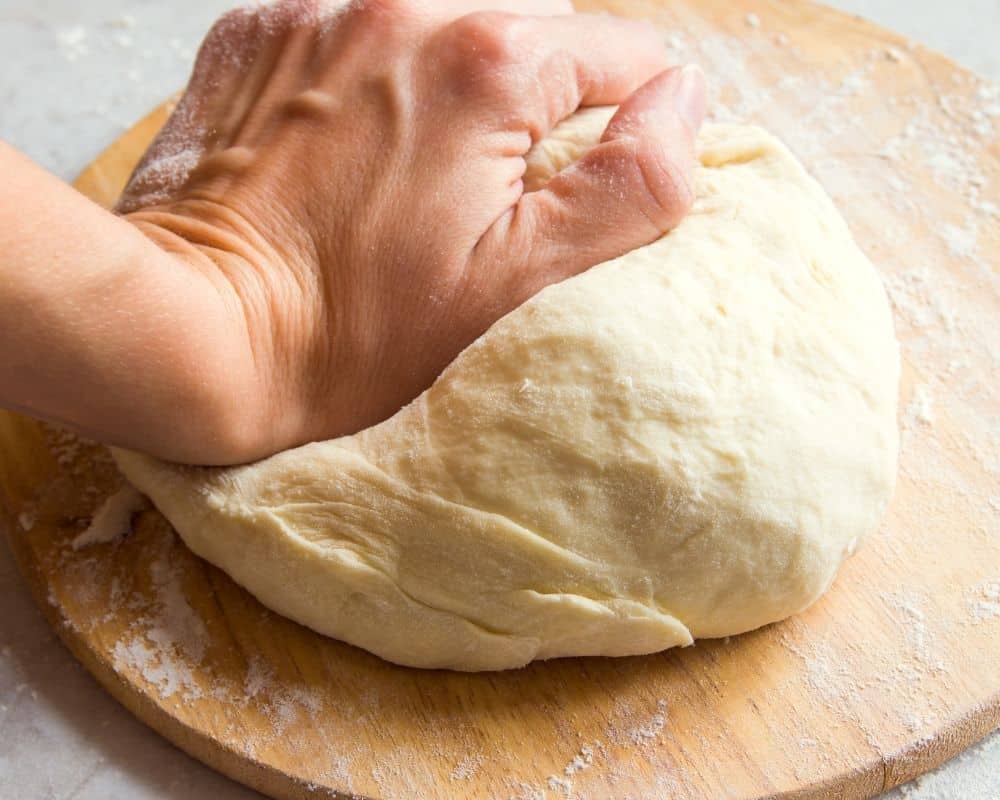
#5. Punch down, shape into an oval loaf-like shape and turn the seams under.
I simply tuck the excess dough underneath the bottom of the loaf without using water to pinch the seams and it works just fine!
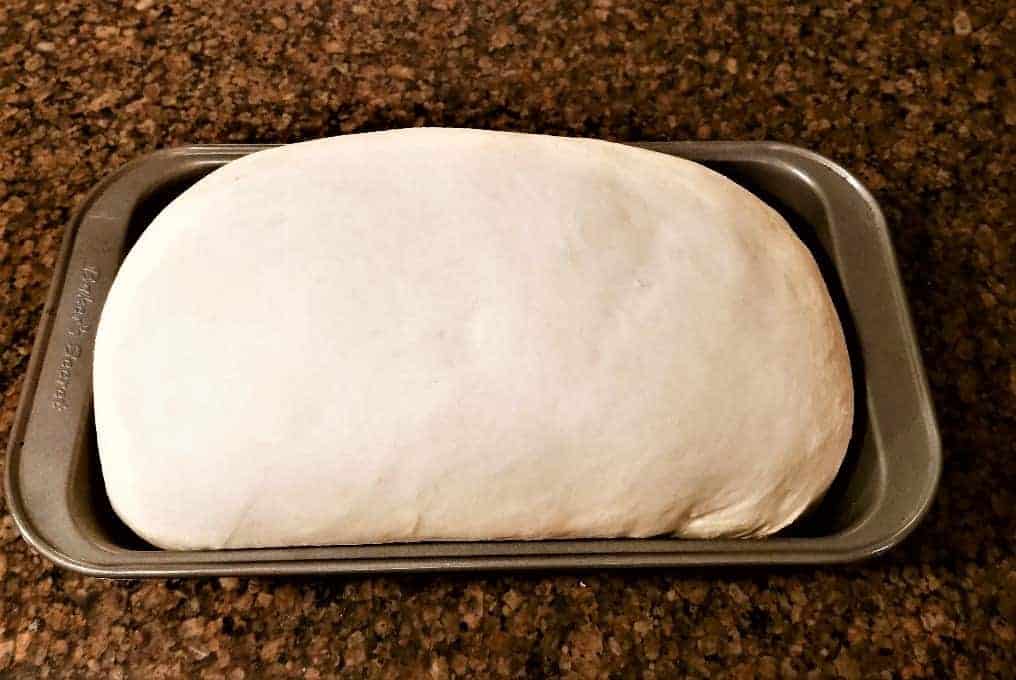
#6. In a greased loaf pan, let dough rise a second time until almost doubled – approximately one hour.
I lightly cover the pan with plastic wrap for this step.
I prefer metal baking pans or even cast iron over glass, if you have a choice.
The bread just seems to bake more evenly as the (non-glass) pans distribute and hold heat better.
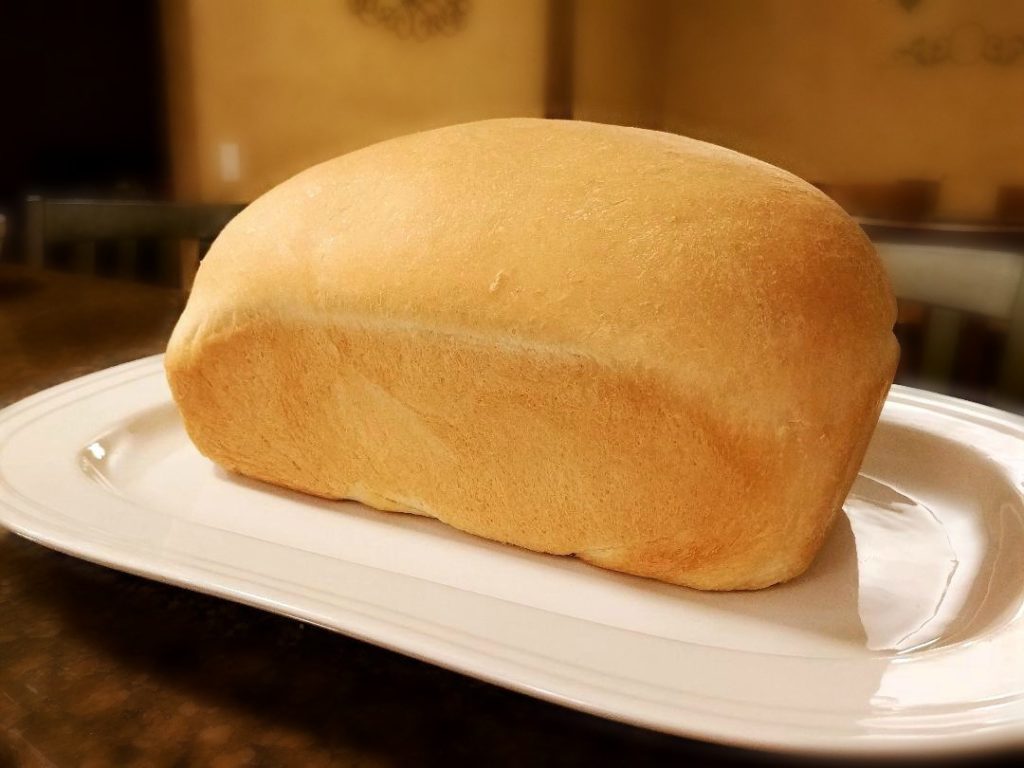
#7. Bake approximately 25 minutes at 350 degrees, or until internal temperature reaches around 190 degrees F.
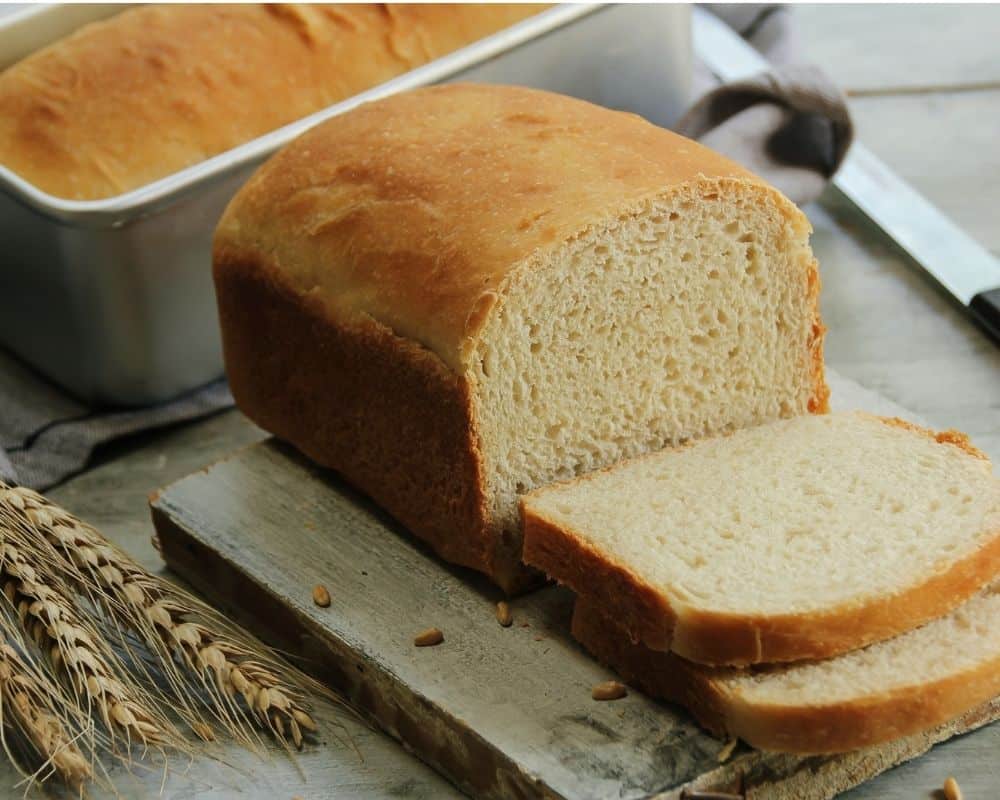
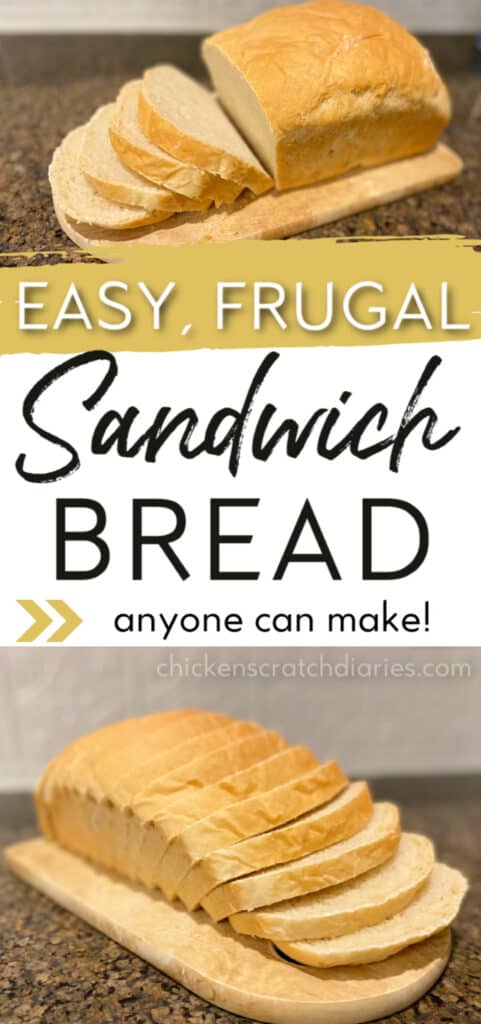
Finished Product:
*Want to teach your kids to cook during LONG days at home? Check out the Kids Cook Real Food e-course!
Isn’t it beautiful?? Gosh, I seriously love how pretty baked bread looks on a platter.
But it tastes even better!
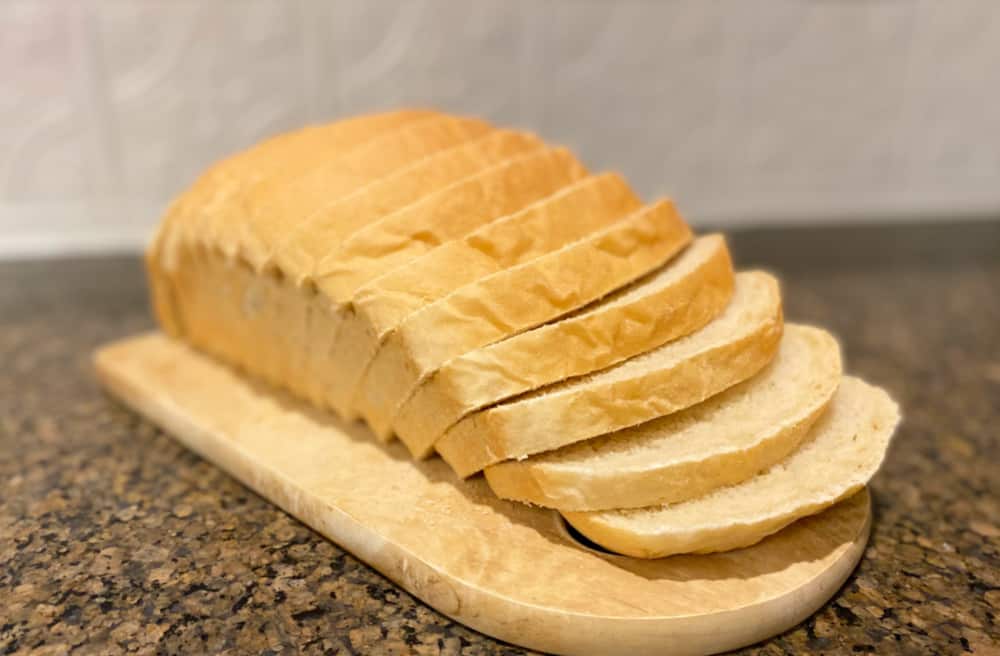
If you’re planning to slice it for sandwich bread, it works better if you wait until the next day.
It will be a little firmer and easier to slice.
That said, even straight out of the oven, it’s actually denser than most bread-machine recipes I’ve tried in the past.
Often with bread machines, you will end up with large air pockets or holes in the bread.
I use this electric serrated knife which is perfect for this task! (Plus a million other uses.)
Update: I have recently upgraded to the Bosch Universal Plus Mixer which handles bread dough even better than my KitchenAid.
(Yes, I love it, in case you’re curious. It’s my new kitchen workhorse!)
Storing homemade bread
If you decide to make several batches of bread to freeze for later, I would recommend freezer bread bags like these. I use them for countertop storage as well as freezing.
You can also try reusable/washable ones like this kind that can extend the life of your loaves.
Bag clips are also really handy and you can use them over and over for any type of bag.
Drop me a note and let me know if you try this recipe – OR leave your favorite tips for saving money in the kitchen!

Thrifty Homemade Sandwich Bread
Ingredients
- 1 cup hot water
- 2 Tbsp Sugar
- 2-3/4 tsp yeast (1 packet + 1/2 tsp)
- 3 cups all-purpose flour OR bread flour
- 1/4 cup vegetable oil (or avocado or olive oil)
- 1-1/2 tsp salt
Instructions
- Mix together the hot water (not scalding, but hot from the tap), sugar and yeast and stir. Let sit for about 10 minutes, allowing the yeast to "bloom".
- Dump this mixture into a stand mixer and mix in the vegetable oil, salt and the flour, one cup at a time, using your dough hook. Alternatively, you can use a hand mixer to combine the ingredients and then knead it by hand
- Continue mixing a few minutes until dough clings to the bread hook and doesn't stick to the bowl. Mix another 3-4 minutes after the non-sticky dough is formed.
- Remove dough from hook, place dough ball in a bowl and cover with a light kitchen towel. Let rise in a draft-free area for approximately 1-1.5 hours or until the dough doubles in size. (Or, see the paragraph in the full post re: the 3 alternative methods you can use to proof the dough more quickly! I often use the yogurt setting on my Instant Pot Duo to cut the rise time in half.)
- Punch down, shape into an oval loaf-like shape and turn the seams under.
- Place in a greased loaf pan; cover loosely with plastic wrap (spray it with cooking oil first if you're worried about it sticking).
- Let dough rise a second time until almost doubled - approximately one hour.
- Bake in loaf pan approximately 25 minutes at 350 degrees, or until internal temperature reaches about 190 degrees F with an instant-read thermometer.
Nutrition Information:
Yield: 16 Serving Size: 1Amount Per Serving: Calories: 155Total Fat: 4gSaturated Fat: 0gTrans Fat: 0gUnsaturated Fat: 3gCholesterol: 0mgSodium: 220mgCarbohydrates: 26gFiber: 1gSugar: 2gProtein: 4g
P.S.- check out our Money Saving Meal Planner for more ways to save every single month!
You might also like:
Quick Oat Bread (with gluten free option)
Best Sourdough Dessert Recipes for Summer

Originally published 1/21/18; last updated 2/27/26.
What a great Pinterest pin! This bread looks delicious!
Thank you Kristin, you’re so kind! We love this recipe. I’m going to remember to make a double batch next time because it’s gone almost as soon as we take it out of the oven. 😉
This looks so good, Brandi! I’ll be pinning this for later!
Thanks for pinning! 🙂
Ill have to try again with bread – Ive never been very successful. But I forgot bread at the store this week. Doh! Trying tomorrow. 🙂
I’m pretty sure I first made this out of necessity too 🙂 No better time to start, ha!
Thanks for sharing! Long time bread baker wanna be here. I successfully made it! It was delicious and with my family of 5 it lasted about 5 min. Double batch next time for sure, lol.
Yay! Glad it turned out well – too well sounds like 😉 I’m thinking about buying these bread pans for a longer but not-as-tall loaf. Maybe to make it last a little longer? I guess they would probably just eat twice as many slices though!
Hi Brandi, have you ever made this bread recipe in the bread machine?
Hi there! Yes, the inspiration recipe for this one was a bread machine recipe. You just let the yeast bloom as in Step 1 and then dump that along with rest of ingredients into bread machine. It called for only 2-1/4 tsp yeast and 1 tsp salt. When I started making it in the kitchen aid, it wouldn’t rise consistently. But in the more temperature-controlled bread machine, the lesser amount of yeast and salt works well. Good luck!
Can you make this with whole wheat flour?
I did substitute wheat flour a few times. If you only use wheat flour, it will be pretty dense and won’t rise much though. I believe I researched this a little and the recommendation was to use 1/2 wheat flour and 1/2 white flour (or bread flour), so try 1.5 cup of each. I am no bread expert, but I would probably add a tad more yeast too.
Could I use whole wheat flour for this recipe? Would other ingredients be used in the same amounts?
I was advised to use half wheat, half white (or bread flour) at the most in order for it to rise. You can experiment with more. 🙂
Hi! I was wondering if you have tried substituting other types of oils or is it only vegetable oil that has the right consistency? I don’t normally keep vegetable oil on hand, my go to oils are canola, olive, and coconut. Thanks!
Hi Macanda! I have used canola oil before, no problem. A quick Google search is telling me that you should be able to substitute coconut oil easily by melting it first. You might notice the flavor a bit (but I love coconut so that wouldn’t bother me!) 🙂 Let us know how it goes!
Love this bread recipe. Thank you!
Glad you liked it Kathilyn!
Brandi, I tried this bread today. Found the recipe and your instructions very easy to follow. It’s the first time I made bread and am ecstatic about the result. So delicious and dense, even though I didn’t wait for the next day to cut it. And, it came out of the oven looking identical to your picture! Thanks very much! Maree
I’m so happy that it turned out well for you Maree! Thanks for letting us know! 🙂
I absolutely love homemade bread but haven’t had much luck finding a recipe I liked. Then I found yours on Pinterest & WOW!! It turned out absolutely perfect. My second loaf in three days is currently baking.
Yay!! I love hearing that. 🙂 Thanks for chiming in Amey.
Hi Brandi,just wondering if you have an ingredients for 4 lofves of bread? Thanks.
Hi there – I have not tried making multiple loaves at once. Mostly because I don’t think my stand mixer could handle all the dough! I have read up on this a little and it appears you can probably safely double the recipe at least – but no need to double the yeast. I would try about 3.5 to 4 tsp yeast? It would be a complete experiment since I’ve never tried it though! Good luck!
When substituting oils do I use the same measurement? Was thinking olive oil since that’s a staple in our house! Thank you in advance.
From what I have read, yes, it’s a 1:1 substitution, however you might want to use an extra-light olive oil because the flavor is stronger and you might notice it in your bread. If you don’t mind an olive-y tasting bread, it probably doesn’t matter though 🙂
What do you use to cut your bread? Do you have an electric knife? Or do you just use a serrated knife? I’m pretty much the worst at cutting things evenly or in straight lines so any advice would be great!
I have a large serrated bread knife (like one of these). An electric knife would be excellent though!
I started pinning bread recipes and yours was the first one that I tried. My middle daughter was home on winter break, she is a vegan so I could not bake anything with eggs or milk. Your bread fit the bill perfectly. Oh, and the bread is just wonderful!! I now make sure to have extra flour and yeast on hand just so I can make this bread whenever I want. Some how I get three loafs out of your recipe. I’m not complaining!☺
That’s amazing! You know, it makes a very tall loaf in my bread pan and I never thought about dividing into at least 2 pans. Great idea -thanks for sharing!
How long would I knead the dough without a mixer?
It looks like approximately 7 minutes per this video.
How much yeast do you use? I don’t use packets. I buy it in the jar!!
Hi Peggy! It’s 2 and 3/4 tsp yeast. I keep mine in a jar too. 🙂
I love this bread recipe. Today I doubled the recipe, used 4 tsp of yeast and avocado oil instead of vegetable oil and it turned out amazing!
Thanks for letting us know on the yeast ratio Kim! I’m going to have to try the avocado oil myself.
I love the short list of ingredients needed to make this bread. I used whole white wheat flour & instead of regular salt I used garlic salt and added dried rosemary (the 1st time) and the current loaf I’m working on: Bruschetta spices from Epicure. Thanks so much for posting this recipe. It’s a keeper, for sure!
Kristy- that sounds amazing! I’m going to have to experiment with spices. Thanks for sharing!
What kind of yeast do you use. Regular or thre rapid rising?
Hi Cathy- just regular yeast.
I made this today and it’s the best sandwich bread I’ve ever made! I used half bread flour and half whole wheat flour. Thank you!!!!
So glad that you liked it Donna!
Hi! I just made them tonight and it came out so wonderful. It’s my first ever successful bread and im thrilled to have finally found this recipe. So thank u 😊. I like my bread a little vit on the sweet side, can i add more sugar? If so, do i need to tweak some ingredients? Hoping for your reply 😊
Hi there! I don’t think it will hurt anything to add a little more sugar! Too much might make it slightly denser but that’s all. Good luck!
Just making this today! On the 2nd time I leave it to double, afterwards, do I cover with plastic wrap and punch dough before putting into oven?
After second rise– no, do not punch down. Just remove the plastic wrap and pop into oven after the 2nd rise. Good luck!
What a delight to found this recipe! Family loves it! This is my 2nd try baking this and it came out like a superstar! Lol… I would like to try bake this freshly in the morning, can i make them overnight? I read something about letting it rise (2nd rise) in the fridge then thaw for 2 hours before baking… Can i do that? 😂 thank u!!!
I think I’ve read about that too…I’ve never tried it though. It’s definitely worth a try- please let us know if it works well!
yes I did add some sugar!! and it came out so wonderful. happy tummy again =)
awesome 🙂
Hi Brandi,
Is it possible to make this bread without a mixer? If so, how can I adjust the mixing times? Thanks so much!
You can mix it by hand- I haven’t done that personally but lots of people do it. In the steps where you’re using the mixer, just mix the ingredients until combined and then do the kneading by hand. It’s not so much about the length of mixing/kneading time but getting the dough to the right feel/consistency. This video might help!
Made this bread yesterday and it is so tasty and easy. I used my stand mixer and the bread turned out great. My husband loves it and I’ll be making it every other day.
Awesome! So glad it turned out nicely for you. It seems to be a pretty foolproof recipe from all the feedback!
2nd week of baking this bread! Already getting easier and smoother to make. Thx again for posting this. (How can we make the dough into 2 loaves?)
Hi there! Some readers have simply divided the dough into 2 pans before the second rise. I keep meaning to purchase pans like these on Amazon so that I can make longer loaves that aren’t as tall.
I made this recipe today. It was super easy, and the most fantastically moist bread ever! I saw someone ask if you needed a mixer – I just used a wooden spoon, and finished off using my hands, as I don’t have my mixer with me. The dough wasn’t sticky at all, so I didn’t mind kneading it by hand. Looking forward to a sandwich! 😄
Awesome, Lauren! Thanks for the tip too.
So glad I found this recipe it’s absolutely amazing ,it’s my second time making this bread today I’m doing half wheat half white flour I added another 1/4 tsp of yeast to the mix ! Thank you for a wonderful bread recipe..
Thanks for the feedback! 🙂 Glad it turned out nicely for you.
If you are using a hand mixer definitely knead in the last cup of flour!
Hi brandi! I hope u can help me with this. I’ve been baking this bread for some times now. But i notice that after the loaf is baked and sliced, i can smell alcohol or something was fermented, though it has still have good flavor, just the smell. I don’t know what the cause of it. Ny first and 2nd trial were okay and no alcohol smell after.. Pls help.
Hi there! I am no expert on this but the most logical explanation I found was that this may happen if you let the bread rise too long (it ferments and the yeast turns cannibalistic). Try adding a little more yeast (maybe a 1/2 tsp more to start with) and see if that helps to reduce the rise time & hopefully the smell! Good luck.
I just made this bread today for the first time
It was super easy and it turned out beautifully and is delicious, Im so excited , thanks for posting this recipe. 🤗
So happy to hear that! Thanks for letting us know!
I’m excited to try this recipe!
I would like to know more about freezing. Can the dough be frozen and if so, at what point? What is the procedure and what would I wrap it in? I have a super tiny kitchen and making dough ahead of time would be less clean-up each week.
Hi Dixie: here’s the easiest way: after the first rise, you would shape into a loaf; put into a baking pan lined with plastic wrap, cover and freeze overnight. The next day you can remove it from the pan and put into a freezer-safe bag. To thaw, place dough into the same bread pan you used previously and let rise approximately 4-6 hours (till it doubles in size). Then bake as normal.
Brandi – If I prepare this in a bread machine, what size loaf should I select (1, 1.5 or 2 lb loaf)?
Thanks in advance! Going to make this later today.
I * think * it’s the 1 lb setting. 🙂
Hubby and I love this bread!! It’s so easy and delicious. Thanks for sharing
Glad you like it!
The bread came out great. This was the first time I finally got to have my dough rise properly. Recipe was easy to follow.. Thanks so much. My husband loved the bread. The only thing I did different was after the final rise in the loaf pan. I rubbed some olive oil on the top and added some thyme leaves. (Not the fresh kind)
Ooooh thyme sounds amazing. Thanks for sharing!
Thanks for the great recipe! I was just wondering what size liaf pan do you recommend? Sorry for the question, I did look through here first before asking you. I just can seem to find out. Thanks
The pan I used is 9.5×5 – hope that helps! You could use a little longer pan too and it shouldn’t affect baking time much.
Can milk be used instead of water? Thanks
From what I’ve read, I think you can definitely try it!
hi friend. Im new to cooking hobby. tried this recipe and it was my first ever attempt to make bread. it was made perfect. my whole family liked it a lot. A good recipe share by you. Thanks a lot.
So glad you liked it! 🙂
Could I leave the sugar out?
I think it’s necessary to make the yeast bloom, but I’ve read that you can try honey or agave nectar in its place!
Mercy, this turned out beautifully. After searching and trying many recipes and methods and failing with crumbly, not dense enough recipes…this held up. Tastes great and all the kids love it too. Great toasted. Finally, an easy, tasty and hearty sandwich bread. Thank you.
So glad it turned out well for you! I love it toasted too 🙂
Has anyone tried making this with Gliuten Free Flour?
So good! I started making bread for the week on sundays a few months back and have been experimenting with different recipes. This is my first one into my recipe binder! It’s a huge hit with my son who generally finds homemade bread too tough for him. This one is wonder bread soft and so nice and tall :). When I took it out of the oven I thought it had a great big air bubble up top because of how soft and tall it was. But nope!! Just beautiful and delicious bread 🙂
I did tweak it a little as we go through 2 loaves a week. So I do:
2C. water
3Tbsp brown sugar
9g yeast
6C. Flour
1/2C. Oil
2tsp salt
Thank you for those measurements- I’m going to try that next time!
Best recipe I’ve ever tried. Now my family won’t eat store bought bread anymore. Thanks for the recipe.
Very welcome!
I’m crying! First time ever making bread. It did not rise at all! My yeast said it expires next month. Could it be that it’s too old?? I dont know what I did wrong!??!!
Help!
Ah, it may be too old! If you store it in the freezer it tends to last longer (past expiration). But yeast can be tricky. I would try it again with new yeast 😉 Good luck!
What about making these into rolls using a muffin tin? How much dough would one use for each and for long in the oven?
Hmmm I am not really sure. I would have to experiment. I am thinking you would divide it evenly between 2 muffin tins and it would definitely take less time to bake. If you try it, please let us know!
I am eager to try this recipe. It looks delicious! I was wondering if you have a picture of it sliced.. I am curious what the inside looks like.
Nicole- I just updated the post with a picture for you. 🙂
Thanks for the great recipe! My husband loves it, and I’ve made it more than a couples time now. I was just going to suggest to all the readers or there, I’ve been using halve white flour, and halve spelt. And it’s phenomenal. I didn’t think it would rise, but it made no difference.
Thanks again!
Interesting- thank you for the info!
If it doesn’t get eaten right away how long do you store it? Just wrap it and put it in a bread box?
Yes to both -it will last a few days or more (maybe 4), depending on temperature and humidity in your home.
can this bread be made with gluten free flour like bob red mill 1to1 all purpose flour that has xanthan gum in it to replace the gluten in reg. flour
Hi Eula- I would imagine so, though I haven’t tried it yet!
Hi Brandi! I had a bit of a problem. I was super excited to make the bread, but when I was mixing it with the dough hook in the kitchen aide, it never got sticky. It never got to the point where it stuck to the dough hook. It stopped sticking to the side of the bowl, but it stayed in little individual ball-type things and never got sticky or all clumped together. Can you think of what I did wrong? (I added in all the ingredients in the right order and the right amounts, I double checked).
Hmmm I am not coming up with any ideas other than too much liquid. Try it again and let us know, please! 🙂
Just made this bread and we love it! Like you mentioned in the previous comment, it’s basically fool proof! Thanks for sharing this recipe with us.
So glad you had good results! Thanks!
I have tried this recipe twice. I even bought new yeast thinking I got a bad pack. It doesn’t rise. I don’t know what I am doing wrong. I have never had trouble making bread. It even mixed and pulls away from the bread hooks like it’s supposed too. What am I doing wrong
Hi Heather. Bread can be finicky unfortunately! Did you just use the pack of yeast or the full 2 -3/4 tsp of yeast? (1/2 tsp more than a standard packet). Also some bakers have mentioned that adding a little more salt can help it rise more. Making sure your water is warm enough is another thing to check. Also be sure you’re letting the yeast bloom the full 10 minutes- a few minutes more wouldn’t hurt either. I hope you have better results next time!
I made this bread yesterday and when it came out of the oven, it looked like the picture, but when it cooled the crust wrinkled, it tasted great, but how can I correct this problem?
You could try baking it just a tad longer to make sure there isn’t excess moisture trapped inside the loaf. Also try leaving it in the baking pan for a few minutes after removing from oven, then transferring to a cooling rack in a draft-free area. Good luck!