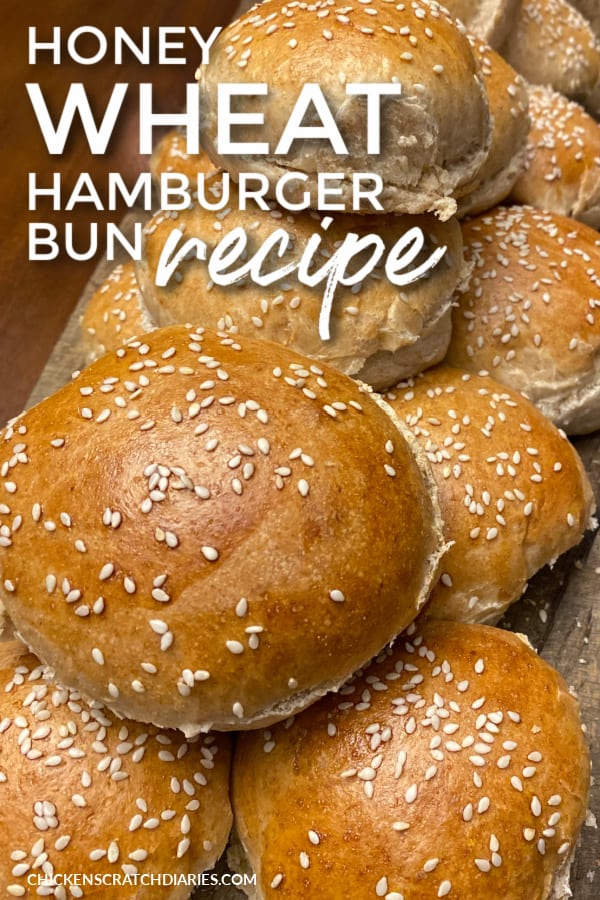
Honey Wheat Hamburger Bun Recipe (Great for beginners!)
A flavorful honey wheat hamburger bun recipe that might just replace those overpriced bakery buns in your home.
I’ve wanted to craft a go-to hamburger bun recipe for some time now. As someone who loves to bake bread, I’m not sure what took so long!
But the wait was worth it. These honey wheat hamburger buns will make it hard to think about store-bought hamburger buns ever again.
They’re seriously that good.

Crafting the perfect hamburger bun
My list of demands for the perfect bun included:
- Dense enough to hold up to the sloppy goodness it’s meant to hold. (Dinner rolls are too light and fluffy for this task.)
- Full of flavor. (I can get a tasteless bun at the grocery store any old day.)
- Budget-friendly. (The “good” deli buns are a little pricey for my family of 6.)
- Easy to make.
Need I say more?
This post likely contains affiliate links. Please see our disclosure for more info.
Why make your own hamburger buns
We all know that making bread takes a little time, so it’s not exactly something you can whip up at the last minute.
But knowing what’s in your food, avoiding extra preservatives and having fresh bread for dinner are just a few of the reasons I now love making my own hamburger buns.
The added bonus is you get to avoid the grocery store since you can easily keep your pantry stocked with these ingredients.
If you plan to make bread often, I recommend buying yeast in bulk. You can store it in a glass jar in the freezer where it will last around 1-2 years.
With that said, you can also prepare this dough and have it ready to bake in just a few hours’ time.
It’s not complicated at all, and the results are worth the minimal effort.
>> Other bread recipes to bookmark:
Frugal Homemade Sandwich Bread
Crusty Dutch Oven French Bread
Quick and Easy Oat Bread Recipe
How to Make Honey Wheat Hamburger Buns
Printable recipe card also provided at end of post.
Ingredients
- 2.5 teaspoons of active dry or instant yeast
- 1/4 cup warm water
- 2 teaspoons of sugar
- 4 tablespoons unsalted butter, softened
- 1/4 cup honey
- 3 cups white flour (I prefer Gold Medal or King Arthur flour.)
- 1.25 cups wheat flour
- 2 teaspoons salt
- 1 and 1/4 cup warm water
- 1 tablespoon vegetable oil
- 2 tablespoons of sesame seeds
- 1 egg
Instructions
1| In a mixing bowl for a stand mixer, stir together the yeast, the 2 teaspoons of sugar and the 1/4 cup of warm water. Let sit for 5-10 minutes, until the mixture is foamy/bubbly looking.
If using instant yeast instead of active dry yeast, no need to let the mixture sit; move onto step 2.
2| Add the unsalted butter, salt and honey and begin mixing on low speed, using the dough hook attachment of your stand mixer.
3| Alternate adding the white flour, wheat flour, and the 1-1/4 cup of warm water a little at a time until well incorporated.
4| Continue mixing for about 5 minutes until a soft dough forms that doesn’t stick to the bottom of the bowl.
Add another 1/4 cup of white flour if it’s too sticky after 5 minutes of mixing.
5| Use your hands to form dough into a ball and place back into mixing bowl.
Add about 1 tablespoon of vegetable oil on top, then flip the ball over a few times to give it a light coating.
Any oil will do, but vegetable oil is mild and won’t flavor your bread like olive oil will.
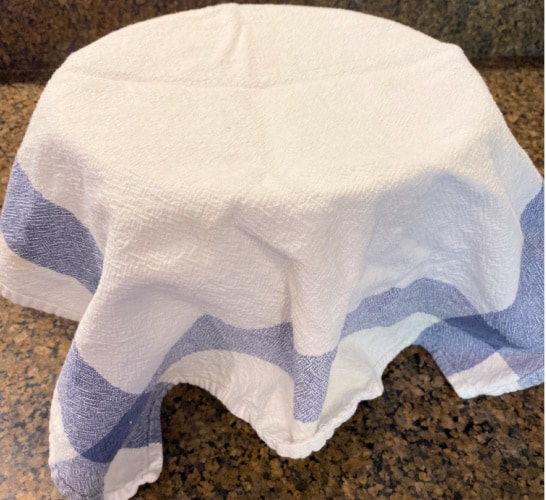
6| Cover with a tea towel and let rise for approximately one hour.
The dough won’t quite double in size (as with making lighter sandwich-type breads), and that’s ok.
7| Press the dough down and form into a log (similar to making cinnamon rolls) and cut into even slices.
I was able to get 15 standard-size buns but this may depend on how much your dough rises and how large you want to make your buns.
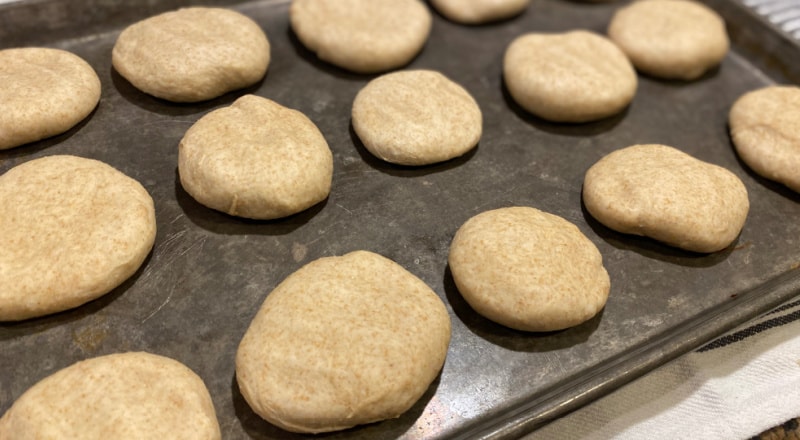
8| Form each slice into a ball and tuck the seams under.
Place on a cookie sheet about an inch apart and press down to flatten slightly.
9| Cover again with a tea towel and let rise another 1-2 hours.
The dough should puff up a little but not double in size, once again.
10| Towards end of the 2nd rise, preheat oven to 400 degrees F.
If your dough hasn’t risen much at all in the first hour, place your pan on top of the stove and the residual heat from the preheating oven should help finish the process.
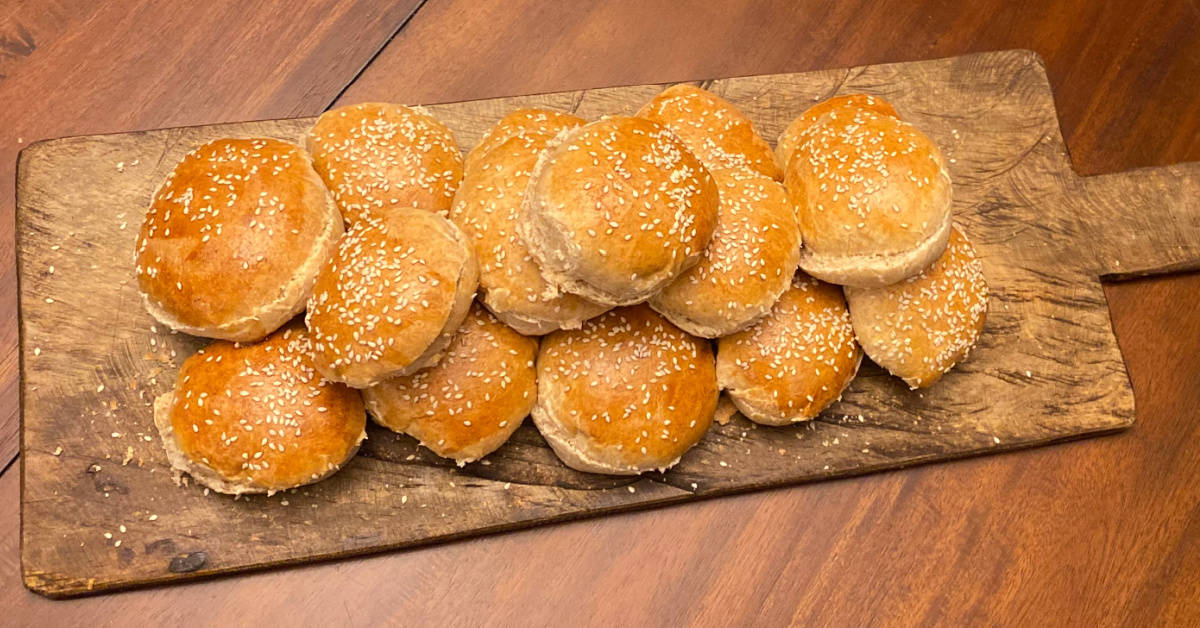
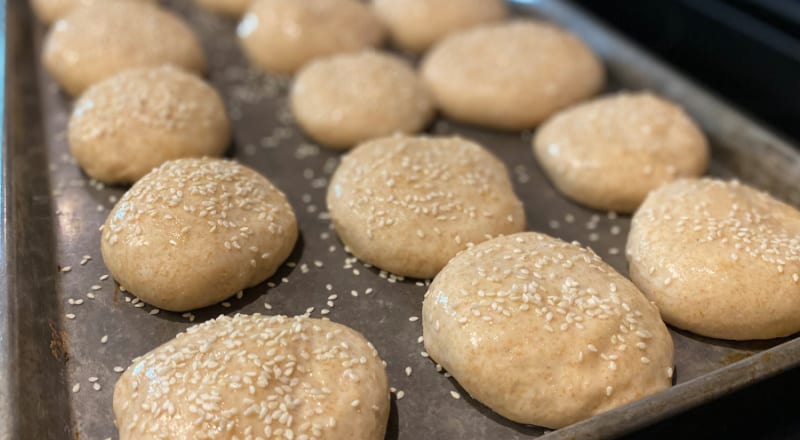
11| Separate the egg white and use this to brush the top and sides of each bun. Sprinkle with sesame seeds.
Don’t skip this step! The egg wash is what makes them shiny and gives them a nice golden color.
12| Bake at 400 degrees for approximately 15 minutes. (Larger buns may need extra baking time).
The buns should turn a nice medium-golden brown on top.
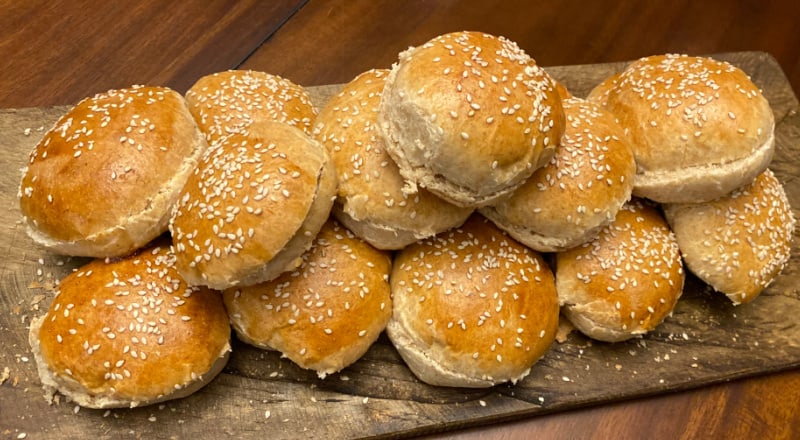
After buns cool, slice in half lengthwise with a serrated knife.
You can serve burgers or sandwiches on them….or just eat them warm with a big ‘ol slab of butter.
Or just do both. The choice is yours!
I didn’t say it was an easy choice, though. 😉

Honey Wheat Hamburger Buns
Easy, delicious homemade honey-wheat hamburger bun recipe that will make you turn your nose up at store-bought buns from now on!
Ingredients
- 2 and 1/2 tsp active dry or instant yeast
- 1/4 cup warm water
- 2 tsp sugar
- 4 Tbsp unsalted butter
- 2 tsp salt
- 1/4 cup honey
- 3 cups white flour (Gold Medal works best for me.)
- 1 and 1/4 cups wheat flour
- 1 and 1/4 cup warm water
- 1 tablespoon vegetable oil
- 1 egg (only egg white needed- for egg wash)
Instructions
- Mix together the yeast, sugar and 1/4 cup warm water in the mixing bowl of a stand mixer. Let sit for 5 minutes until yeast starts to "bloom". (If using instant yeast, no need to let it bloom.)
- Add the unsalted butter, salt and honey; mix on low speed with the dough hook attachment of your stand mixer.
- Alternate adding the white flour, wheat flour, and the 1-1/4 cup of warm water little at a time until a soft dough forms.
- Continue mixing for about 5 minutes until a soft dough forms that doesn't stick to the bottom of the bowl. (Add another 1/4 cup of white flour if it's too sticky after 5 minutes of mixing.
- Use your hands to form dough into a ball and place back into mixing bowl. Add about 1 tablespoon of vegetable oil on top, then flip the ball over a few times to give it a light coating.
- Cover with a tea towel and let rise for one hour. (The dough shouldn't quite double in size.)
- Press the dough down and form into a log shape (similar to making cinnamon rolls) and cut into even slices. (Should yield 10-15 depending on how large you prefer.)
- Form each slice into a ball and tuck the seams under. Place on a cookie sheet and press each one down to flatten slightly.
- Cover again with a tea towel and let rise another 1-2 hours. The dough should puff up a little but not double in size once again.
- Towards end of the 2nd rise, preheat oven to 400 degrees F.
- Separate the egg white and use this to generously brush the top and sides of each bun. Sprinkle with sesame seeds.
- Bake at 400 for approximately 15 minutes until medium golden-brown.
- Let cool and slice lengthwise.
You might also like:
Simple White Sandwich Bread Recipe
Artisan French Bread in a Dutch Oven
Easy Honey Oat Bread (GF/DF option)
How much is 1.25 cups?
Thank you.
It is approximately 296 grams if my calculator is right 🙂
I’m thinking it’s 1 1/4 cup. Because .25 is the same as one quarter of something. Like 25¢ is a quarter of a dollar.
That is correct!
Hello, just wondering if they freeze well. How long are they good for. Thank you can’t wait to make these. Barbara
They are freezer-friendly, yes! The honey helps preserve bread a little longer. But I would probably try to use them within a month or so, in the freezer. If you double-wrap them they may last a little longer without drying out. I hope you enjoy them!