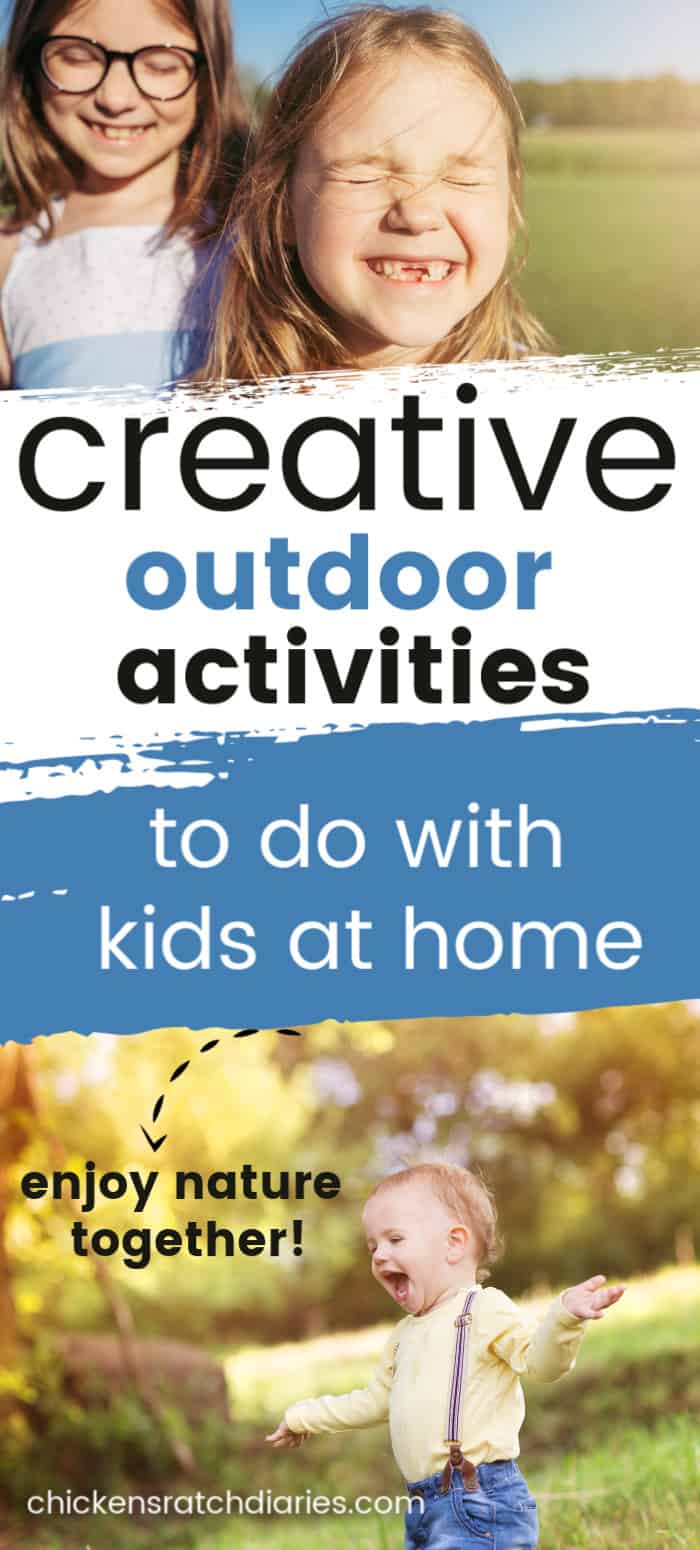
This guest post by Leann at The Hunting Mom is packed with creative outdoor activity ideas for kids. Experience the outdoors with your little ones this summer, with these fantastic tips!
If I were to write an ode to summer, it would express my ardent feelings about how much I adore the sunshine and longer days, kids running around barefoot through the sprinklers, and the break from winter coats and muddy boots.
My family is fortunate to live in a state that experiences the four seasons in four equal doses.
And we appreciate the unique beauty that each brings.
But for some reason, winter starts feeling really long right around February, when we catch our yearly case of cabin fever.
Thankfully, spring always arrives like a teaser, with her spurts of sun and mud puddles before finally giving way to summer’s warmth and promise of outdoor fun for kids.
My kiddos thoroughly enjoy simple backyard staples such as blowing bubbles and splashing in the kiddie pool – don’t get me wrong!
But I also try to make time for fun outdoor activities that will not only provide opportunities to teach them something —
— but also help them really engage with and nurture curiosity about the natural world.

This post likely contains affiliate links. Please see our disclosure for more info.
Here are a few of our favorites.
(Note: printable instructions are included for the activities that involve detailed steps!)
GET DOWN AND DIRTY
1. Hobbit Garden
Benefits: Develops fine motor skills; demonstrates gardening process
What you’ll need:
- Either a round or square planter, or a small, unplanted corner of your garden
- Potting soil
- Packet of flower seeds
- Empty toilet paper roll
- Scissors
- Stapler
- Brown paper (a paper bag work well, too)
- Markers, crayons
- Clear packing tape
- Optional: moss, hobbit figurine
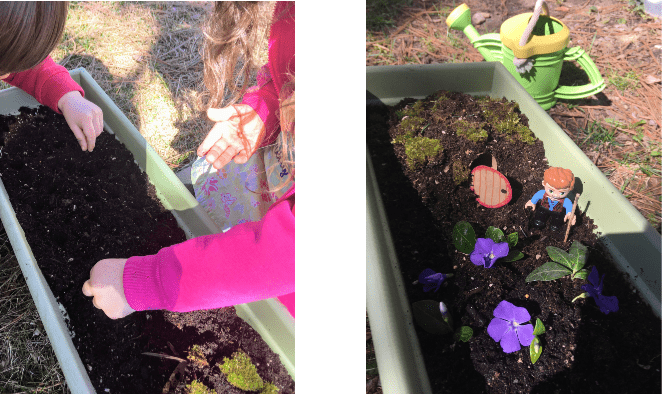
First, prepare your hobbit house by cutting the toilet paper roll in half.
Place one of the halves on the brown paper and trace around it to make a circle for the door.
Kids can draw a door knob and decorate it, then cut it out and place a piece of tape over the front and back (this will keep it waterproof).
Trim off the excess tape, and secure the door to the halved toilet paper roll with staples to complete the hobbit house.
Prepare the planter by filling it with potting soil.
Bury the hobbit house in the dirt, allowing some space for the doorway, and place moss on top.
Sow the seeds into the surrounding dirt (at least four inches away from the house) according to package directions.
Sprinkle with water and place in shade or sun—whichever your specific seeds require.
Explain how seeds need good soil, light, and water to grow.
Let the kids do the watering and have fun watching them grow!
Hobbit House-Printable Instructions
Materials
Instructions
- Prepare your hobbit house by cutting the toilet paper roll in half.
- Place one of the halves on the brown paper and trace around it to make a circle for the door.
- Kids can draw a door knob and decorate it, then cut it out and place a piece of tape over the front and back (this will keep it waterproof).
- Trim off the excess tape and secure door to the halved toilet paper roll with staples to complete the hobbit house.
- Prepare the planter by filling it with potting soil.
- Bury the hobbit house in the dirt, allowing some space for the doorway, and place moss on top.
- Sow the seeds into the surrounding dirt (at least four inches away from the house) according to package directions.
- Sprinkle with water and place in shade or sun—whichever your specific seeds require.
- Explain how seeds need good soil, light, and water to grow.
- Let the kids do the watering and have fun watching them grow!
2. Toy Car Construction Site
Benefits: Gross motor skill/sensory development (textures); demonstrates traction
What you’ll need:
- Toy cars/trucks (race cars, dump trucks, tractors, etc.)
- Dirt, gravel, and sand (2-3 cups of each)
Pour the dirt, gravel, and sand into three small piles on an even surface.
Kids can load up the toy dump truck and make roads, or simply smooth down the piles and drive the toy vehicles over them.
Ask questions such as, “Which truck do you think has the best tires for the gravel?” and “Which road is smoothest/bumpiest?”
Note: This can also serve as a winter activity.
My two-year-old son is content to drive his trucks over ice and snow for hours at a time.
Sprinkling a little road salt or sand on the ice can add some variety and demonstrates the effect they can have on roads.
Toy Car Construction Site- Printable Instructions
Materials
- Toy cars/trucks
- Dirt, gravel
- Optional: Sand
- Optional: Rock salt
Instructions
- Pour the dirt, gravel, and sand into three small piles on an even surface.
- Kids can load up the toy dump truck and make roads, or simply smooth down the piles and drive the toy vehicles over them.
- Ask questions such as, “Which truck do you think has the best tires for the gravel?” and “Which road is smoothest/bumpiest?”.
Note: This can also serve as a winter activity. My two-year-old son is content to drive his trucks over ice and snow for hours at a time. Sprinkling a little road salt or sand on the ice can add some variety and demonstrates the effect they can have on roads.
3. Scat Search
Benefits: Encourages focused observation; teaches scat identification
What you’ll need:
- Nature trail or area that is frequented by wildlife, such as geese, turkeys, and deer
- Optional: magnifying glass; reference guides (Whose Poop is That? and Tracks, Scat, and Signs are super cute!)
What kid doesn’t love talking about poop? 😉
Whenever we’re outside, my kids are always eager to inform me of any scat piles they spot–
–as well as their best guess as to what bird or animal it might have come from.
Game preserves, mountain trails, and river bottoms are great places to look for scat.
Scat Search- Printable Instructions
Materials
- Nature trail or area that is frequented by wildlife, such as geese, turkeys, and deer
- Optional: magnifying glass
- Optional guide: Whose Poop is That?
- Optional guide: Tracks, Scats and Signs
Instructions
- Use one of the guides listed above (or just your imagination/knowledge!) to look for animal droppings.
- Check game preserves, mountain trails, and river bottoms (or your backyard!)
- Let the kids guess what kinds of animals or birds it might have came from.
CREATE ART AL FRESCO
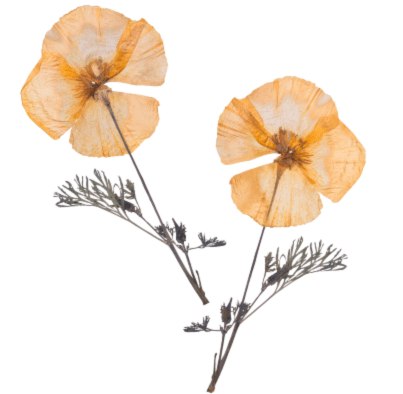
4. Pressed Flower Bookmark
Benefits: Ongoing project that helps develop fine motor skills and teaches plant preservation process; end product is a special keepsake
What you’ll need:
- Fresh flowers
- Paper towels or parchment paper
- Hardcover book or flower press
- Natural paper or cardstock
- Tweezers
- Glue
- Contact paper
- Hole punch
- Ribbon
Pressed flowers
June is a prime month for wildflowers in our area and my daughter absolutely adores smelling, picking, and admiring them.
I recently showed her how to press flowers by placing them between paper towels inside a book, then placing the book between our boxspring and mattress.
It works, but I am thinking that a quality flower press would be easier (and may just be the perfect birthday gift for her).
Once the flowers are dry (after ten days or so), they are ready to be turned into a pretty keepsake.
To make the bookmark, have your little helper cut paper or cardstock into desired size.
Tip: If your little one struggles with scissors, outline a rectangle with a marker and have him/her cut along the line.
Place a small amount of glue on the paper where you want to place the flower(s).
Have your child use tweezers to pick them up and place them carefully onto the glue.
Allow to dry for several minutes to dry, then cover with clear contact paper.
Apply contact paper to the back side and trim edges.
Punch a hole at the top of the bookmark and tie in a piece of ribbon to finish.
Pressed Flower Bookmark- Printable Instructions
Materials
Tools
- Tweezers
- Glue
- Hole punch
Instructions
- Press fresh flowers by placing them between paper towels (or parchment paper) inside a book or a flower press.
- If using a book, place book between mattress and boxspring of a bed for approximately 10 days.
- Once flowers are dry, they are ready to be turned into a bookmark.
- To make the bookmark, have your little helper cut natural paper or cardstock into desired size. [Tip: If your little one struggles with scissors, outline a rectangle with a marker and have him/her cut along the line.]
- Place a small amount of glue on the paper where you want to place the flower(s).
- Have your child use tweezers to pick them up and place them carefully onto the glue.
- Allow to dry for several minutes to dry, then cover with clear contact paper.
- Apply contact paper to the back side and trim edges.
- Punch a hole at the top of the bookmark and tie in a piece of ribbon to finish.
5. Pure & Pretty Paints
Benefits: Helps develop fine motor skills; utilizes pigments found in nature
What you’ll need:
- 1 cup flour
- 1 tsp salt
- Water
- Whisk
- Pots
- 2-3 beets, 1 cup spinach, and 2-3 cups yellow dandelion heads
- Piece of cardboard for paint “palette”
Little did your kids know, but your latest garden harvest and weed pile can be used to make paint!
Prepare the colors by placing the beets, spinach, and dandelions in separate pots and just barely covering each with water.
Bring the three pots to a boil, then simmer for at least 10 minutes (the beets will take longer if you plan on eating them later).
Cool, then strain each pot into a separate glass bowl or container. Set aside.
In another pot, bring 2 cups of water and 1 tsp. salt to medium heat.
Gradually whisk in the 1 cup of flour.
Turn heat to low and continue mixing until desired consistency is reached.
Allow to cool, then divide into three separate containers or bowls.
Stir in a few teaspoons of each plant color into the three bowls of flour mixture to get three colors of paint.
Use a piece of cardboard or egg carton as a palette.
Kids can enjoy painting paper, rocks or wood with their natural paints.
Tip: If your dandelion yellow does not get as dark as you like, add a dash or two of turmeric powder.
*Shortcut technique: you can also simply let them “paint” by rubbing dandelion heads, green leaves, and flower petals onto white paper.
(And it makes less mess!)
Pure & Pretty Paints- Printable Instructions
Materials
- 1 cup flour
- 1 tsp salt
- Water
- 2-3 beets
- 1 cup spinach
- 2-3 cups yellow dandelion heads
Tools
- Whisk
- Cooking pots (at least 3)
- Piece of cardboard (for palette)
Instructions
- Prepare the colors by placing the beets, spinach, and dandelions in separate pots and just barely covering each with water.
- Bring the three pots to a boil, then simmer for at least 10 minutes (the beets will take longer if you plan on eating them later).
- Cool, then strain each pot into a separate glass bowl or container. Set aside.
- In another pot, bring 2 cups of water and 1 tsp. salt to medium heat.
- Gradually whisk in the 1 cup of flour.
- Turn heat to low and continue mixing until desired consistency is reached.
- Allow to cool, then divide into three separate containers or bowls.
- Stir in a few teaspoons of each plant color into the three bowls of flour mixture to get three colors of paint.
- Use a piece of cardboard or egg carton as a palette.
- Kids can enjoy painting paper, rocks or wood with their natural paints.
[Tip: If your dandelion yellow does not get as dark as you like, add a dash or two of turmeric powder.]
6. Making Tracks
Benefits: Encourages observation skills; teaches animal track identification
What you’ll need:
- A place to find animal tracks (river bottom, wildlife refuge, etc.)
- Plaster of Paris
- Mixing utensil and container
- Water
- Optional: track identification guide

This is a cool project that makes a lasting impression (pun slightly intended).
The first order of business is to find a good, deep track. Post-rain is a good time to look.
Once you and your crew find one that you like, get ready to mix the plaster (2 parts plaster to 1 part water).
Then pour over the track, and wait about 15 minutes for it to dry.
Check out more detailed instructions here.
Making Tracks- Printable Instructions
Materials
- A place to find animal tracks (river bottom, wildlife refuge, etc.)
- Plaster of Paris
- Mixing utensil and container
- Water
- Optional: Track identification guide
Instructions
- Find a good, deep track in the woods, a river bottom, a wildlife refuge, etc.
- Mix 2 parts plaster of paris to 1 part water.
- Pour a small amount of plaster over the track, slightly larger in diameter than the track. Make sure mixture is fairly thick to keep it from running everywhere!
- Wait about 15 minutes for it to dry, then simply lift and brush off the dirt.
- More detailed instructions can be found here.
REST IN NATURE
7. Swing Easy
Benefits: Promotes sensory development; provides alternative to nap/rest time
What you’ll need: Hammock or saucer swing
Note from Brandi: We also LOVE this kind!
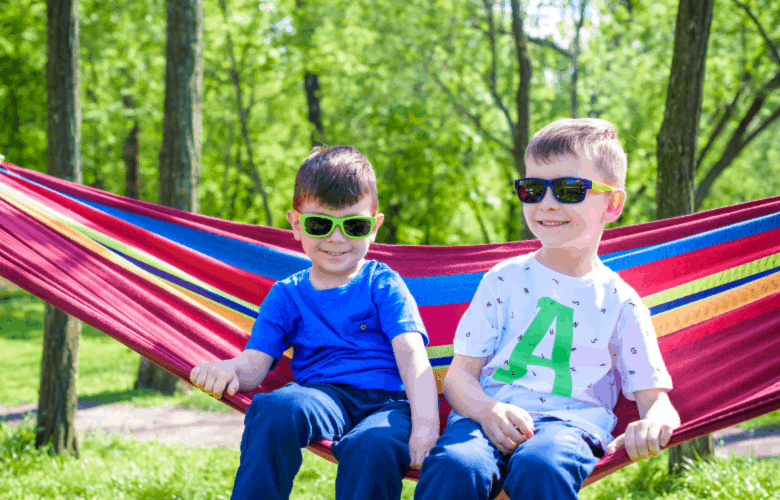
Relax outdoors!
When your kids really needs to take a break, but don’t want to come inside…
…allowing them to rest—to just be—outside on a swing or hammock makes a good compromise.
Some relaxation-promoting prompts can include:
- cloud-gazing
- closing their eyes and listening to birds
- imagining they are sleeping on a boat
- playing “I spy”
8. Build a Teepee
Benefits: Encourages dramatic play; provides opportunity to teach about structure types and Native American history
What you’ll need:
- Six sticks, at least five feet in length
- Poncho, tarp, sheet, or blanket
- Rope or twine
- Optional: twigs, cotton balls
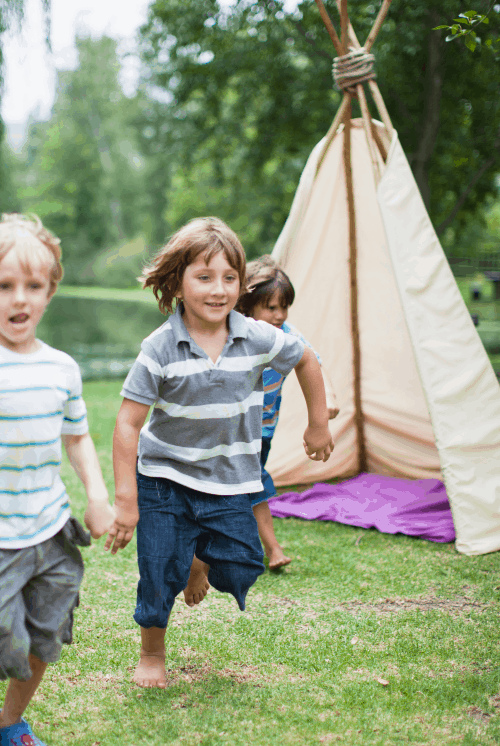
Kids love having little cozy spots to call their own.
When we’re inside, blanket forts behind the couch are always a hit with my toddlers.
Outside, they enjoy their little teepee by the garden.
To build it, we found six uniform-ish sticks and broke off any protruding branches.
We then placed them evenly apart in a circle, leaned them onto each other, and secured the tops together with twine.
A wool blanket served as its cover.
(If you have an old sheet you are willing to part with, it works nicely to cut out a small hole in the middle for the sticks to come through, lay the sheet evenly across the sticks, and cut a slit for the door.)
My kids like to gather small twigs to make pretend “fires” inside the teepee, and I let them have a few cotton balls to stick on the end of longer twigs for “marshmallow roasting”.
Build a Tepee- Printable Instructions
Materials
- 6 sticks, at least 5 feet in length
- Poncho, tarp, sheet or blanket
- Rope or twine
- Optional: twigs, cotton balls
Instructions
- Gather six uniform-ish sticks and break off any protruding branches.
- Placed sticks evenly apart in a circle, lean them onto each other, and secure the tops together with twine or rope.
- Throw a wool blanket or similar on top for a cover - or, use an old sheet and cut out a small hole in the middle for the sticks to come through.
- Lay the sheet evenly across the sticks and cut out a slit for the door
- Gather small twigs to make pretend “fires” inside the teepee, and stick a few cotton balls on the end of longer twigs for “marshmallow roasting”.
9. It’s a Bug’s Life
Benefits: Encourages focused observation
What you’ll need:
- Ants, spiders, or beetles to observe
- Optional: magnifying glass
There’s something really mesmerizing about watching minuscule creatures do big things. Ants are my personal favorite.
A hot, lazy summer day is the perfect time to grab the kids and a few breadcrumbs, and wait to see what the crumbs attract.
It usually doesn’t take long for an ant to come along and try to carry some back to its home.
What a perfect opportunity to impart how “she prepares her bread in summer and gathers her food in harvest” (Proverbs 6:8).
HUNT & GATHER
10. Shed Hunting
Benefits: Gets kids moving; develops observation skills
What you’ll need:
- A place to look for shed antlers, such as a wildlife management area
Antlers are uniquely beautiful works of art in their own right.
They seem like even more of a treasure when your kids find them!
Deer, elk, and moose tend to shed their antlers toward the end of winter/early spring.
However, most states do not allow for shed hunting until mid-spring, so be sure to check the regulations in your area before venturing out.
If you are new to shed hunting, you’ll find some helpful tips here.

11. Learn Letters, Naturally
Benefits: Gets kids moving; provides a kinesthetic way for children learn their letters
What you’ll need:
- Outside area where natural elements such as rocks, sticks, pinecones, flowers, leaves, and feathers are plentiful
Having kids spell out their names using only elements from your backyard or other outdoor play area is a wonderful activity for children who know their alphabet and are interested in putting letters together to form words.
When my daughter was at this stage, the first thing she wanted to learn how to write was her name.
Once learned, she wrote it everywhere (which actually got to be somewhat problematic at times!).
Spelling it outside with colored rocks (see natural paints, #5- above) provided a good outlet for her name-writing obsession.
Alternatively, you can just say, “Find me something that begins with the letter __” and send them searching.
12. Geocaching
Benefits: Helps motivates little hikers; provides opportunity to teach navigation/mapping skills
What you’ll need:
- Cell phone
- Map (While your smart phone may provide everything you need at the touch of a button, there’s nothing like a good, old-fashioned map to give kids a good visual.)

Geocaching is becoming an increasingly popular activity because it:
1) adds an element of excitement to a family hike
2) offers a tangible goal besides a landmark or final destination; and
3) helps spur on tiny trekkers to keep going up the trail.
Go to geocaching.com to start your next adventure.
PARTY OUTSIDE
13. Outdoor Party
Benefits: Fun way to burn energy; kids have plenty of room to run around
What you’ll need:
- Party supplies
- Treats
- Guests
When the weather’s gorgeous and the kids want to have friends over, why not make it a party and give them something to look forward to?
If you have a child whose birthday falls in the summer, an outdoors-themed birthday is a perfect way to celebrate.
And, Pinterest is full of great ideas for cakes and decorations.
Parents have lots of options when it comes to finding great gifts for outdoorsy kids, too.
Even sans summer babies, there are still plenty of good excuses to throw an outdoor party.
Garden parties, pool parties, teddy bear picnics, summer solstice parties—get out there and celebrate!
Whether you live in the city or out in the country and have plans for a busy summer or a lazy one–
–I hope that you and your family will have lots of opportunities to make memories together enjoying God’s creation.
It’s amazing out there!
About the Author:
Leann is an outdoor-lovin’ mama who lives in Montana with her husband and two children. She shares recipes, field notes, and more on her blog, The Hunting Mom. You can also connect with her on Facebook.

You might also like:
29 Cheap or Free Ideas for Family Summer Fun
40 Ways to Entertain Kids Indoors
Raising Kids in a Small Town: Benefits of Country Living
7 Apps and Websites for Kids That Beat YouTube (here’s why)
How to Hold onto their Growing-up Years in a Hurry-up-Grow-up World
These are such great ideas! I’m going to do the Construction Site for my son once my others head back to school soon 🙂 He’d also love building a Teepee if I can find big enough sticks! Thanks for sharing!